A Simple Apache Kafka Cluster With Docker, Kafdrop, and Python
This guide will demonstrate how to deploy a minimal Apache Kafka cluster on Docker and set up producers and consumers using Python. We’ll also deploy an instance of Kafdrop for easy cluster monitoring.
“Apache Kafka is an open-source distributed event streaming platform used by thousands of companies for high-performance data pipelines, streaming analytics, data integration, and mission-critical applications.” — Apache Kafka
Prerequisites
This tutorial expects you to have a Unix system (Mac or Linux) with Docker Compose installed. You can find instructions to install Docker and Docker Compose by following the official Docker documentation.
The full code for this tutorial can be found on GitHub.
Apache Kafka Architecture
Apache Kafka’s architecture is comparatively straightforward compared to other message brokers, such as RabbitMQ or ActiveMQ.
Kafka is essentially a commit log with a very simplistic data structure. It just so happens to be exceptionally fault-tolerant, horizontally scalable, and capable of handling huge throughput. This has made Kafka extremely popular for many large enterprise organisations, where applications range from pub-sub messaging to log aggregation.
We’ll be deploying a simple Kafka setup, consisting of the following components:
- Kafka cluster: A distributed system of Kafka brokers
- Kafka broker: The message broker responsible for mediating the data between the producers and the consumers. They’re responsible for the bulk of I/O operations and durable persistence within the cluster.
- ZooKeeper: Manages the overall controller status in the cluster. It acts as a configuration repository, maintaining cluster metadata and also implementing the actual mechanics of the cluster.
- Kafka producer: Client applications responsible for appending records to Kafka topics
- Kafka consumer: Client applications that read from topics
The below diagram depicts the architecture of the minimal Apache Kafka cluster we’ll be deploying. The most basic setup consists of just one broker and one ZooKeeper node (blue); however, to add resilience, we’ll deploy two additional brokers into the cluster (green).

Running ZooKeeper in Docker
Verify you have Docker and Docker Compose successfully installed:
$ docker -v
> Docker version 19.03.12, build 48a66213fe
$ docker-compose -v
> docker-compose version 1.27.2, build 18f557f9
Great, we’re ready to get started! Let’s start by deploying ZooKeeper. First, create a new working directory to store the files and data we’ll be using in the tutorial:
mkdir kafka
cd kafka
Next, create a new file called docker-compose.yml. This contains the configuration for deploying with Docker Compose.
touch docker-compose.yml
Now, open this file in your favourite text editor. We’re ready to add configuration to deploy ZooKeeper.
Going through the configuration line by line:
version: '3'
services:
  zookeeper:
    image: zookeeper:3.4.9
    hostname: zookeeper
    ports:
      - "2181:2181"
    environment:
      ZOO_MY_ID: 1
      ZOO_PORT: 2181
      ZOO_SERVERS: server.1=zookeeper:2888:3888
    volumes:
      - ./data/zookeeper/data:/data
      - ./data/zookeeper/datalog:/datalog
- Line 1: The Docker Compose file version number
- Line 2: Start services definition
- Line 3: Start ZooKeeper configuration
- Line 4: The Docker image to use for ZooKeeper, downloaded from Docker Hub
- Line 5: The hostname the Docker container will use
- Line 6-7: Expose port 2181 to the host. This is the default ZooKeeper port.
- Line 9: The unique ID for this ZooKeeper instance
- Line 10: The port ZooKeeper will run on
- Line 11: The list of ZooKeeper servers. We’re only deploying one.
- Line 12–14: Mapping directories on the host to directories in the container in order to persist data
Now we can start ZooKeeper by running Docker Compose:
docker-compose up
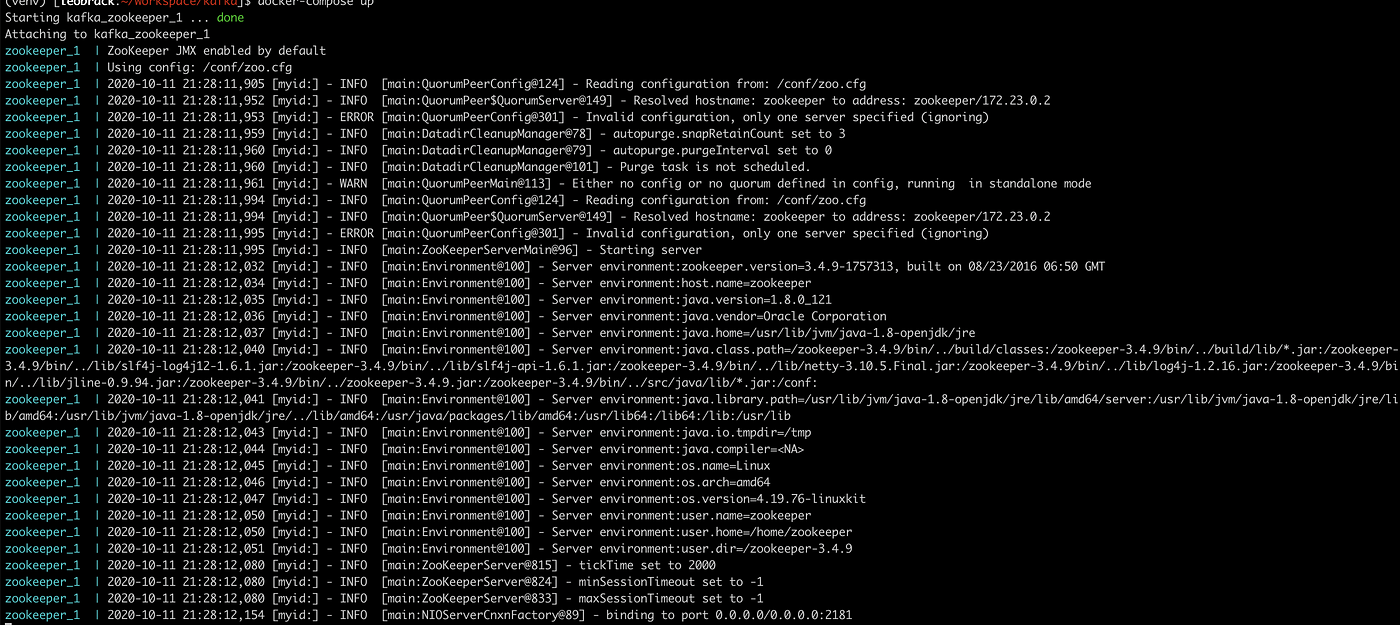
This will download the ZooKeeper Docker container and start a ZooKeeper instance. You’ll see log messages ending with binding to port 0.0.0.0/0.0.0.0:2181. This means ZooKeeper is running and bound to port 2181.
Running Kafka in Docker
Next, let’s add Apache Kafka into the mix. We’ll add our first kafka service to the configuration file:
Again, going through the configuration line by line:
services:
...
  kafka1:
    image: confluentinc/cp-kafka:5.3.0
    hostname: kafka1
    ports:
      - "9091:9091"
    environment:
      KAFKA_ADVERTISED_LISTENERS: LISTENER_DOCKER_INTERNAL://kafka1:19091,LISTENER_DOCKER_EXTERNAL://${DOCKER_HOST_IP:-127.0.0.1}:9091
      KAFKA_LISTENER_SECURITY_PROTOCOL_MAP: LISTENER_DOCKER_INTERNAL:PLAINTEXT,LISTENER_DOCKER_EXTERNAL:PLAINTEXT
      KAFKA_INTER_BROKER_LISTENER_NAME: LISTENER_DOCKER_INTERNAL
      KAFKA_ZOOKEEPER_CONNECT: "zookeeper:2181"
      KAFKA_BROKER_ID: 1
      KAFKA_OFFSETS_TOPIC_REPLICATION_FACTOR: 1
    volumes:
      - ./data/kafka1/data:/var/lib/kafka/data
    depends_on:
      - zookeeper
- Line 5: The image to use for Kafka from Docker Hub
- Line 6: The hostname of the container
- Line 7-8: The port to expose, set to
9091 - Line 10: Kafka’s advertised listeners. Robin Moffatt has a great blog post about this.
- Line 11: Security protocols to use for each listener
- Line 12: The interbroker listener name (used for internal communication)
- Line 13: The list of ZooKeeper nodes Kafka should use
- Line 14: The broker ID of this Kafka broker
- Line 15: The replication factor of the consumer offset topic
- Line 16-17: Mapping volumes on the host to store Kafka data
- Line 19-20: Ensure ZooKeeper is started before Kafka
To start the Kafka broker, you can start a new terminal window in your working directory and run docker-compose up.
If ZooKeeper is still running from the previous step, you can usectrl + c /cmd + c to stop it. Docker compose will start both ZooKeeper and Kafka together if necessary.
Tip: Use docker-compose up -d to start the containers in the background of your terminal window
After starting up the containers, you should see Kafka and ZooKeeper running. Let’s verify everything has started successfully by creating a new topic:
$ docker exec -it kafka_kafka1_1 kafka-topics --zookeeper zookeeper:2181 --create --topic my-topic --partitions 1 --replication-factor 1
> Created topic "my-topic"
Nice! We now have a minimal Kafka cluster deployed and running on our local machine in Docker.
Deploying Multiple Kafka Brokers
Next, we’re going to add two more Kafka brokers into our cluster. Having multiple brokers allows us to build out a more resilient cluster, as we can benefit from replication, fault tolerance, and extra resources.
To do this, we need to add more kafka services to our docker-compose.yml. Let’s add two more brokers:
version: "3"
services:
...
  kafka2:
    image: confluentinc/cp-kafka:5.3.0
    hostname: kafka2
    ports:
      - "9092:9092"
    environment:
      KAFKA_ADVERTISED_LISTENERS: LISTENER_DOCKER_INTERNAL://kafka2:19092,LISTENER_DOCKER_EXTERNAL://${DOCKER_HOST_IP:-127.0.0.1}:9092
      KAFKA_LISTENER_SECURITY_PROTOCOL_MAP: LISTENER_DOCKER_INTERNAL:PLAINTEXT,LISTENER_DOCKER_EXTERNAL:PLAINTEXT
      KAFKA_INTER_BROKER_LISTENER_NAME: LISTENER_DOCKER_INTERNAL
      KAFKA_ZOOKEEPER_CONNECT: zookeeper:2181
      KAFKA_BROKER_ID: 2
    volumes:
      - ./data/kafka2/data:/var/lib/kafka/data
    depends_on:
      - zookeeper
  kafka3:
    image: confluentinc/cp-kafka:5.3.0
    hostname: kafka3
    ports:
      - "9093:9093"
    environment:
      KAFKA_ADVERTISED_LISTENERS: LISTENER_DOCKER_INTERNAL://kafka3:19093,LISTENER_DOCKER_EXTERNAL://${DOCKER_HOST_IP:-127.0.0.1}:9093
      KAFKA_LISTENER_SECURITY_PROTOCOL_MAP: LISTENER_DOCKER_INTERNAL:PLAINTEXT,LISTENER_DOCKER_EXTERNAL:PLAINTEXT
      KAFKA_INTER_BROKER_LISTENER_NAME: LISTENER_DOCKER_INTERNAL
      KAFKA_ZOOKEEPER_CONNECT: "zookeeper:2181"
      KAFKA_BROKER_ID: 3
      KAFKA_OFFSETS_TOPIC_REPLICATION_FACTOR: 1
    volumes:
      - ./data/kafka3/data:/var/lib/kafka/data
    depends_on:
      - zookeeper
To add additional brokers to the cluster, we just need to update the broker ID, hostname, and data volume. Here we’re adding broker 2 with ID 2 and port 9092 and broker 3 with ID 3 and port 9093.
We can verify that the three brokers are running successfully by creating another topic, this time with a replication factor of 3.
$ docker exec -it kafka_kafka1_1 kafka-topics --zookeeper zookeeper:2181 --create --topic my-topic-three --partitions 1 --replication-factor 3
> Created topic "my-topic-three".
Success! We now have a Kafka cluster running with three brokers!
Deploying Kafdrop
It’s always nice to be able to visualise key metrics for your deployments; however, Kafka doesn’t provide its own monitoring interface out of the box. Fortunately, there’s a free open-source offering called Kafdrop we can use.
“Kafdrop is a web UI for viewing Kafka topics and browsing consumer groups. The tool displays information such as brokers, topics, partitions, consumers, and lets you view messages.” — Kafdrop on GitHub
Let’s add another container to our docker-compose.yml for our Kafdrop instance:
version: "3"
services:
...
  kafdrop:
    image: obsidiandynamics/kafdrop
    restart: "no"
    ports:
      - "9000:9000"
    environment:
      KAFKA_BROKERCONNECT: "kafka1:19091"
    depends_on:
      - kafka1
      - kafka2
      - kafka3
Then. redeploy using docker-compose down anddocker-compose up -v. Once it finishes warming up, navigate to localhost:9000 in your browser. You should see the Kafdrop landing screen.

Notice we can now see some information about our Kafka cluster, including the two topics we’ve already created as part of this tutorial.
Adding a Python Producer
Time to publish some messages to Kafka. We’re going to build a simple producer using Python. First install the Python’s Kafka library:
pip install kafka
Next, create a new Python file in your working directory called producer.py. Here, we need to define the list of our Kafka servers and a topic name to publish messages to. We’ve already created my-topic-three, so let’s use that.
from kafka import KafkaProducer

bootstrap_servers = ['localhost:9091', 'localhost:9092', 'localhost:9093']
topicName = 'my-topic-three'

producer = KafkaProducer(bootstrap_servers = bootstrap_servers)
producer = KafkaProducer()

producer.send(topicName, b'Hello World!')
producer.flush()
Finally, to send a message to the topic, we call producer.send. Try running this Python code in a new terminal window:
python3 producer.py
If all goes well, you should be able to see the message show up in the Kafdrop UI.

Adding a Python Consumer
The last piece of the puzzle is adding a Python consumer to receive the messages from Kafka. Create a file called consumer.py, and add the following code:
from kafka import KafkaConsumer
consumer = KafkaConsumer('my-topic-three', bootstrap_servers=['localhost:9091','localhost:9092','localhost:9093'])
for message in consumer:
    print (message)
After importing KafkaConsumer, we need to provide the bootstrap server ID and topic name to establish a connection with Kafka server.
In a new terminal window, run python consumer.py, and then trigger your producer script again. The consumer will read messages from the topic and print the data to the console. You should see a message like this:
ConsumerRecord(topic='my-topic-three', partition=0, offset=0, timestamp=1602500127577, timestamp_type=0, key=None, value=b'Hello World!', headers=[], checksum=None, serialized_key_size=-1, serialized_value_size=12, serialized_header_size=-1)
Conclusion
Nice! You’ve successfully started a local Kafka cluster using Docker and Docker Compose. Data is persisted outside of the container on the local machine, which means you can delete containers and restart them without losing data.
You’ve also added some topics and set up basic producers and consumers for these using the Python Kafka library. Plus, you’ve deployed an instance of Kafdrop to provide an interface for monitoring your cluster.
We’ve just scratched the surface of what’s possible with Apache Kafka. If you’re just starting out, there’s still plenty to learn. You’ve got the foundations and the tools necessary, and there’s no shortage of info on the web. Without a doubt, the best way to learn is to roll up your sleeves and build something.
Thanks for reading, and happy coding!