How to Add a Local DNS Lookup to Hosts File
What Is The Hosts File?
When you type a website URL into the address bar of your browser, a request is sent to a type of internet server known as a domain name server. This server takes the URL you typed and then checks which specific IP addresses are listed for the actual servers that host the content you’re looking for.
The problem with this is that if something’s wrong with the name server, you’re not going to get access to the correct site. Even worse, if the name server has been hijacked, you might end up at a fake site! The good news is that you can manually specify the link between specific IP addresses and website addresses, simply by adding a local DNS lookup to your “hosts” file.
The hosts file is simple to understand. It’s just a plain text file. Incidentally, this is why you should just edit the file with something like Notepad, which won’t try to change the format or add extra formatting to the file.
Inside the hosts file, you can add a list of IP addresses along with the web address that the IP address should point to. You can combine any IP address and web address, even if they don’t actually go together. You could make the actual IP address for Bing.com point to Google.com if you wanted to.

Windows will always check the hosts file first before sending a request to a name server. So if an address you type into your web browser is listed in the hosts file, you’ll be redirected to the IP address listed in the file.
What Is A Local DNS Lookup?
The process described in the previous paragraph is a local DNS lookup. Your computer looks up the IP address by itself, from your local disk, without needing to contact an external server. It’s that simple!
Why Add Local DNS Lookup To The Hosts File?
There are a few reasons you’d want to add a local DNS lookup to your hosts file. We’ve already mentioned a few reasons at the outset of the article, but people have found quite a few creative ways to use this simple feature.
One important reason to add entries to your hosts file is speed. It will always be faster to do a local lookup than going out to an external server. Especially if that server is unreliable. Putting your most important or most frequently used sites in the hosts file means you never have to worry about your DNS service causing access issues.

You can also use the hosts file to block sites that you never want that computer to access. All you have to do is put an IP address into the hosts file for that site which either doesn’t go anywhere or points to a benign IP address. Common redirections include 0.0.0.0 and 127.0.0.1, This is the so-called “loopback” address. Check out our YouTube video for more details on that.
If you have local devices such as routers, IP cameras, network-attached storage and so on, you can use your hosts file to give their IP addresses an easy to remember name.
Using Premade Hosts Files
If it sounds pretty tedious to add dozens or even hundreds of sites to your hosts file, then you aren’t alone! The good news is that there are plenty of places on the web where you can find pre-made lists that you can simply copy and paste into your own hosts file.
The main problem with this is that there could be malicious reroutes hidden in these lists. Which means you either need to verify each IP address by hand or make sure that you trust the source of the list.
Editing The Hosts File In Windows 10
Since the hosts file leaves some room for mischief, you can’t just open it and edit away. You’ll need administrator privileges on your computer in order to make changes. Before you make any changes to your hosts file, we strongly recommend you copy and paste it’s original contents into another text file just in case something goes wrong!
To modify your hosts file in Windows 10, follow these steps:
- Open the Start Menu and type “Notepad”.
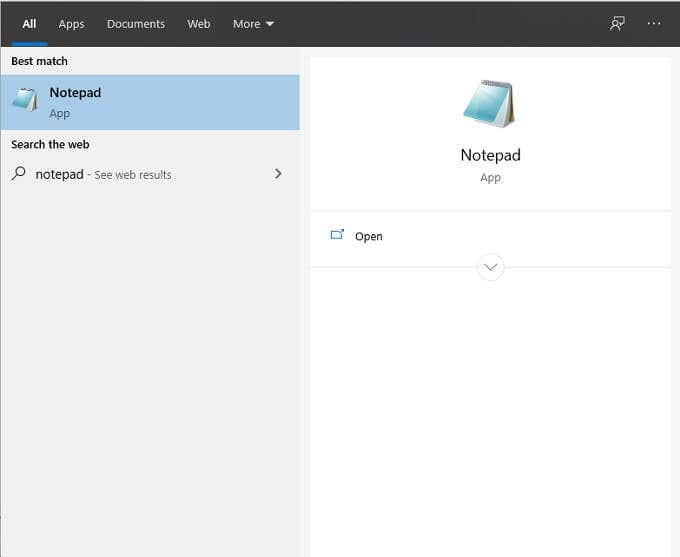
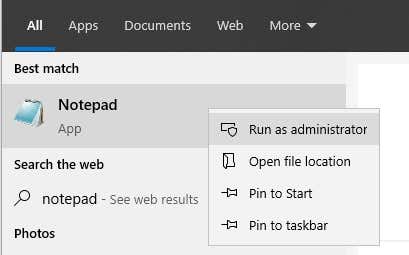
- Once Notepad appears, right-click on it and select “Run as administrator”.
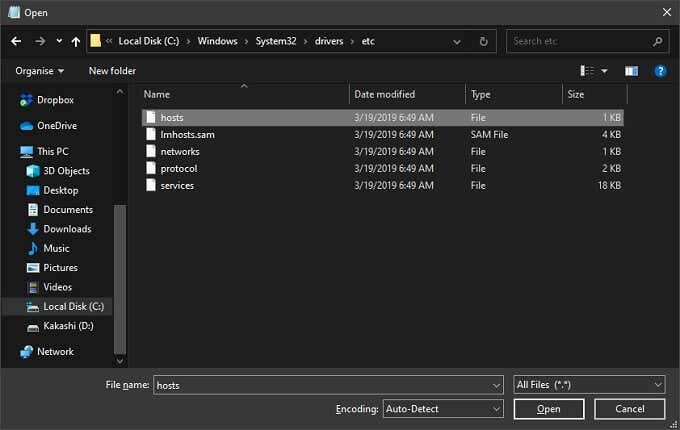
- n Notepad, click Open and head to c:\Windows\System32\Drivers\etc\hosts and open it the hosts file. Remember to change the file type to “All Files”.
- You should see this default hosts file from Microsoft.
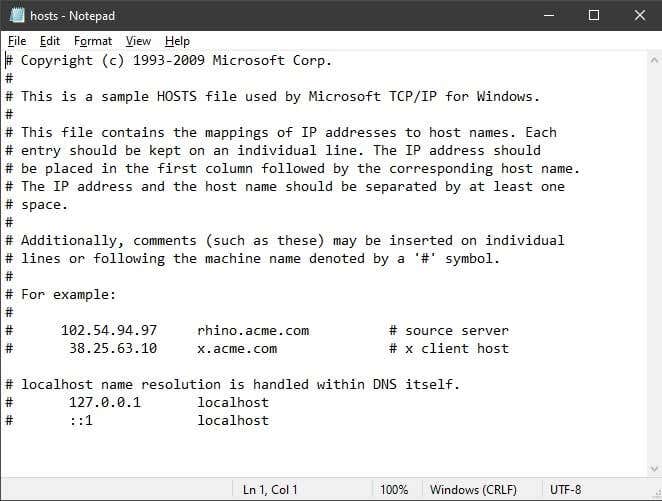
- Don’t worry about any of the text already in the document. You can just leave it as is and add your own entries at the bottom of the file. Any line that starts with a “#” symbol is treated as a comment and not used for name lookups.
Adding a local lookup to the list is super-easy. Just write down the IP address of the site, followed by a space and then the website’s address.
Remember to save what you’ve added when closing the file. That’s all you have to do! Now your computer will skip over the whole DNS lookup process when accessing the sites you’ve specified.
How To Find A Website’s IP Address
What if you don’t know the IP address of a site you want to add to your hosts file? It’s actually pretty easy to find a site’s IP address using the Command Prompt in Windows 10. Here’s how:
- Open the Start Menu and type “cmd”.
- After the Command Prompt opens, type “tracert” followed by a space and the site you want to check. In this example, it’s “google.com”. Then press the Enter key on your keyboard.
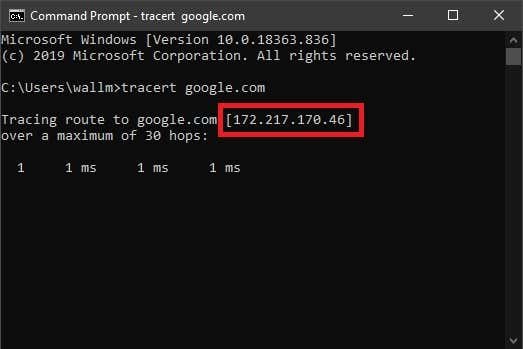
- Here you’ll see the IP address of the site.You can now use this address in your hosts file.
The Hosts With The Most
Who would think that such a small text file hidden deep in the Windows folder could turn out to be so useful? Now you’re a proper local lookup guru, taking control of how your computer accesses websites.