How to Dump a Database using DBeaver
While trying to generate a dump database using DBeaver, I stumbled across a few challenging issues. I had to resort to my best friend Google and source the bits and pieces in a few blog posts.
That’s why I am combining all the steps to generate a database dump in one place.
Disclaimer: I am using a MacBook Pro to demonstrate all the steps. If you wish to have a version of this blog post that targets Windows computers, just drop me a line in the comments section below.
Install MySQL Database Server
If you already have MySQL Server installed on your computer, you may skip this section.
Let’s navigate to MySQL Downloads page.
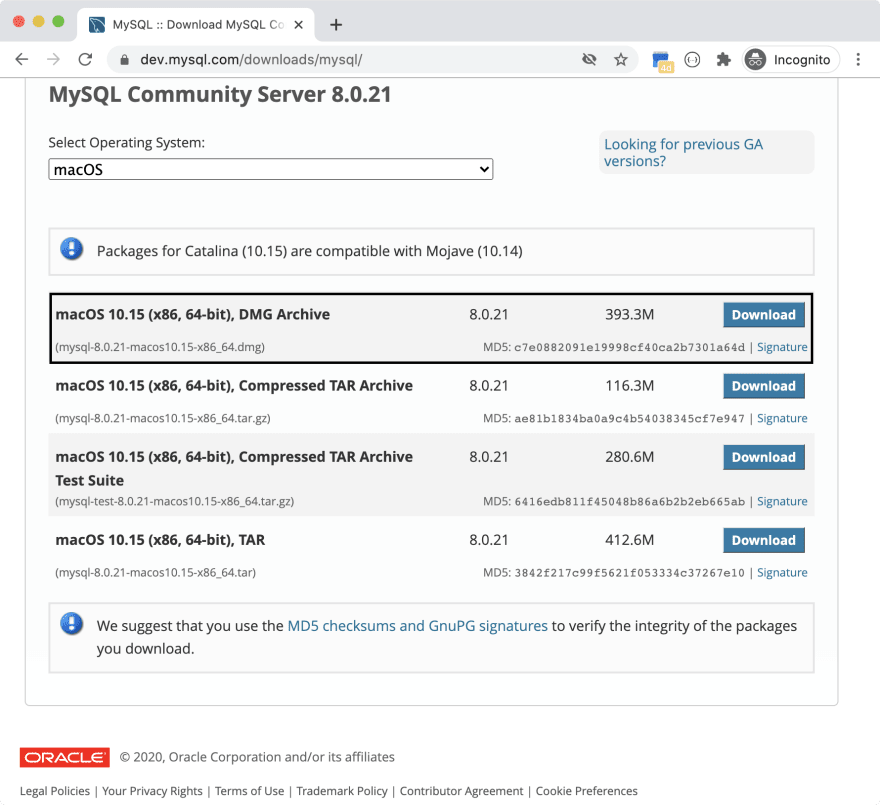
Select the first option and click the Download button.
Once complete, double-click the installer and follow the steps to install the database server on your computer. Make sure to save the root password. You will need it later to connect to the database.
What’s DBeaver
DBeaver is a multi-platform, multi-database management tool for developers, database administrators, and analysts.
DBeaver supports a variety of database engines including MySQL, PostgreSQL, SQLite, Oracle, DB2, SQL Server, Sybase, MS Access, Teradata, Firebird, Apache Hive, Phoenix, Presto and many others.
If you don’t have it installed, hit up their website and download a copy of the software. The installation is a few simple steps and you get it up and running in no time.
Connect to MySQL Server using DBeaver
Open up DBeaver, click the Database menu and then select the New Database Connection menu item.
Step 1: Select database engine
The process starts by selecting the database you are trying to connect to. Make sure to have SQL selected on the left-side menu, then click the icon named MySQL 8+.
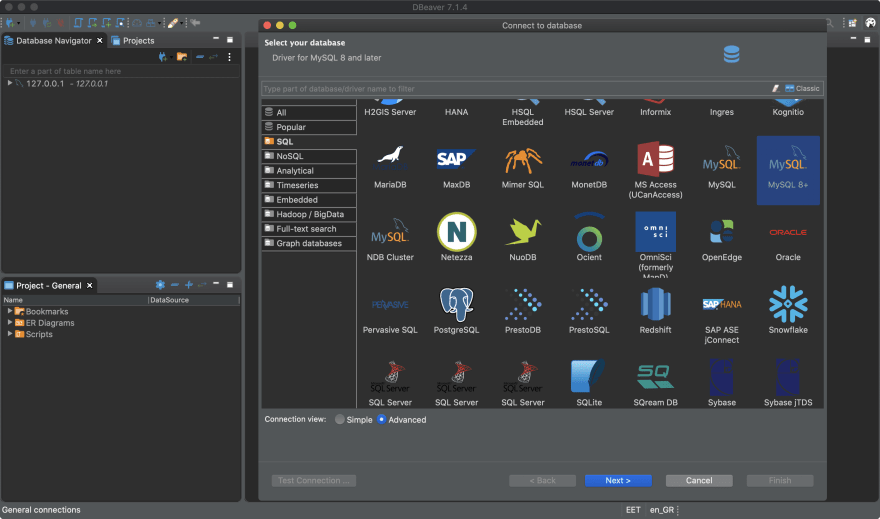
Locate and click the Next button.
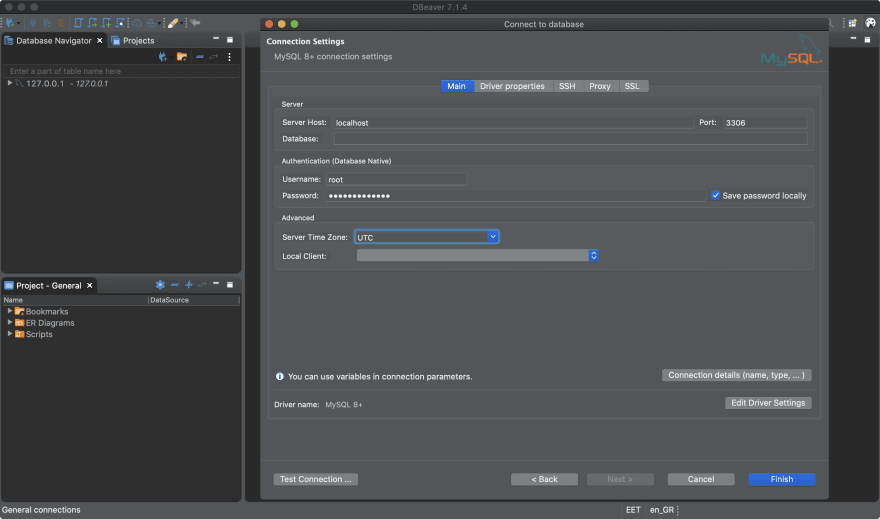
Step 2: Enter database engine details
Most of the configuration settings are already populated on the next screen. In the Password field, enter the password you allocated when installing MySQL Database Server.
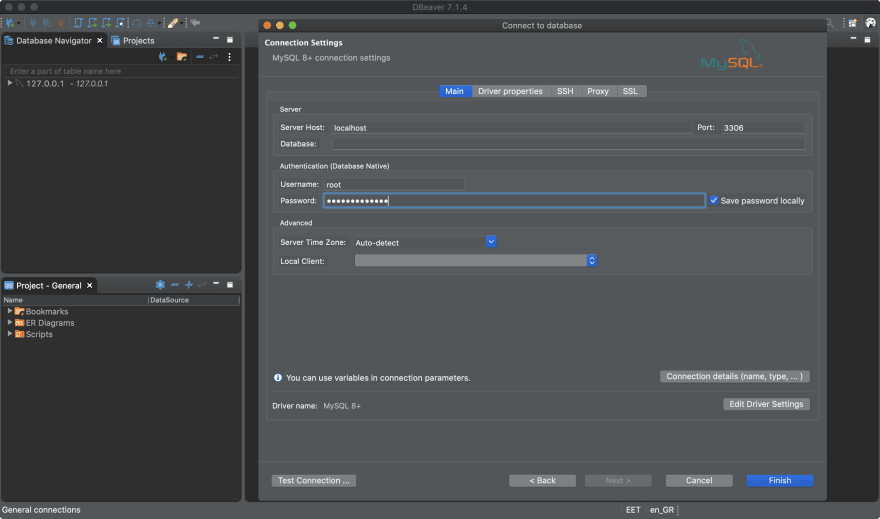
At the bottom of the screen, make sure the Driver name is MySQL 8+.
Step 3: Configure the driver settings
While you are on the same screen, click the Edit Driver Settings button.
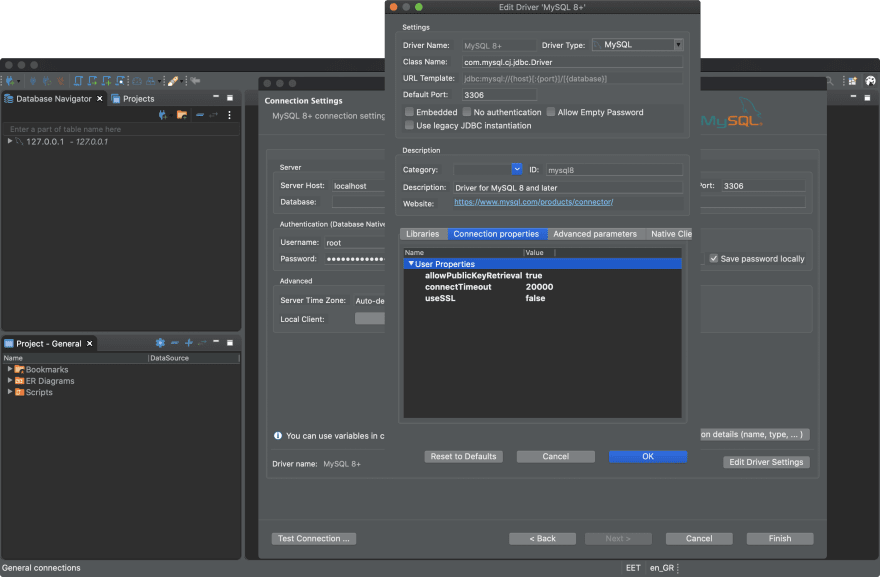
Click the Connection properties section and make sure to add the configurations settings listed.
allowPublicKeyRetrieval: true
connectTimeout: 20000
useSSL: false
Locate and click the OK button.
Step 4: Set the Server Timezone
Locate the Server Time Zone field under Advanced Settings. Click the dropdown list, locate and select the value of UTC as shown in the diagram below.
Step 5: Configure the connection settings
Let’s change the name of this new connection. Click the Connection details.

I’ve changed the connection name to local. Feel free to change it to whatever you want.
Step 6: Test the connection
While on the same screen, click the Test Connection button. You should receive a popup message saying Connected. If you don’t, drop me a line in the comments section for help.
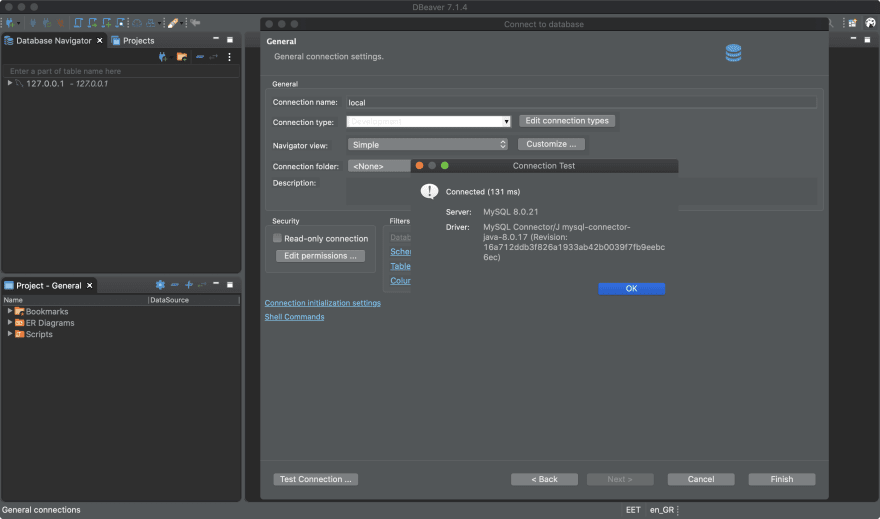
Finally, click the Finish button. Only after this step, you’ll see the new connection created inside DBeaver and ready for use.
Import a sample database
For the sake of this tutorial, I will be importing a sample database to work with. Navigate to MySQL Sample Database, and click the Download MySQL Sample Database button to download yourself a copy of the database.
Unzip the sample database file and you get a MySQL script file with an extension of .sql.
Switch back to DBeaver and perform the following steps:
- Right-click the MySQL connection.
- Click the
SQL Editormenu item. - The SQL Editor is open on the right side of the screen.
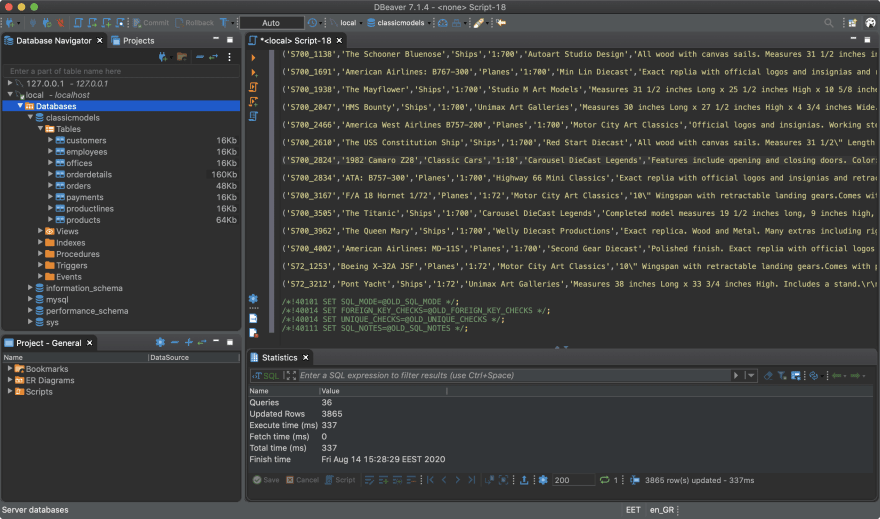
- Copy the sample database script and paste it inside the SQL Editor.
- Locate and click the
Execute SQL Scriptmenu item. In case you cannot find it, locate the horizontal menu on the SQL Editor, go to the 3rd menu item and click it.
Give a few seconds, expand the MySQL connection node, then right-click the Databases node and hit Refresh. You will notice a new database named classicmodels with a few tables.
That’s it!
Generate a dump of the newly added database
In this final section, we explore how to generate a database dump for the newly added database.
Step 1: Open the dump database screen
Right-click the classicmodels database, go to Tools and then click Dump database.

The database and its tables are all selected for you. Before moving on, we need to select the MySQL Native Client in order to make use of the mysqldump library.
Step 2: Configure the MySQL native client
Locate and click the Client button.
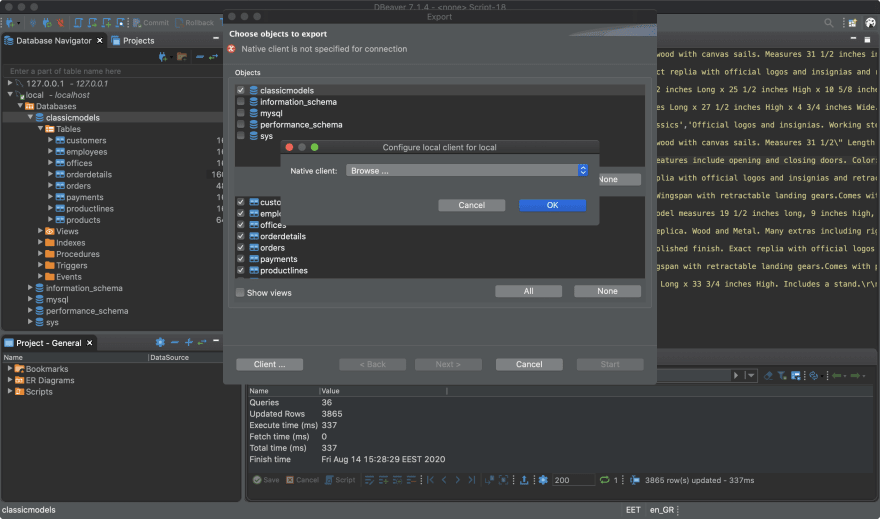
Select the Browse from the Native client dropdown list.
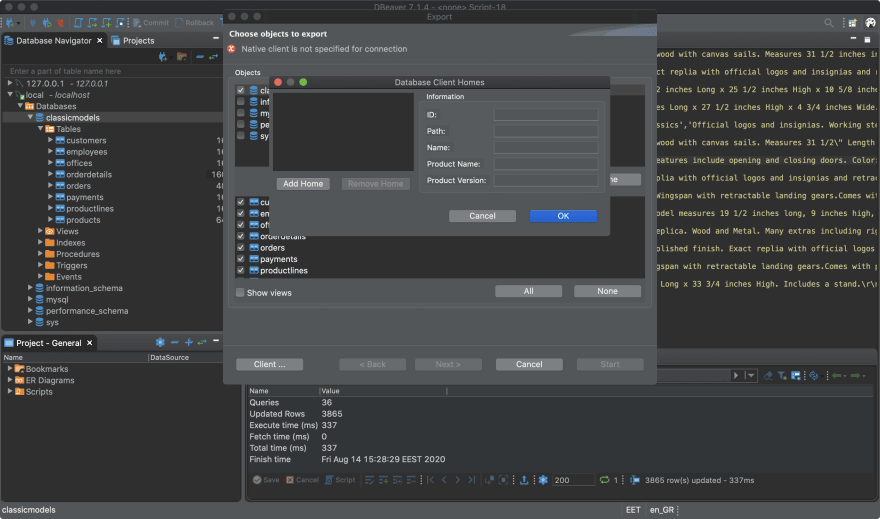
Click the Add Home button. Navigate to the path /usr/local and click the MySQL installation folder named mysql-8.0.21-macos10.15-x86_64.
Click `Open’.
Click the OK button, and the next OK button too.
Now you notice that the Next button is enabled.
Step 3: Configure dump settings
Click on the Next button.
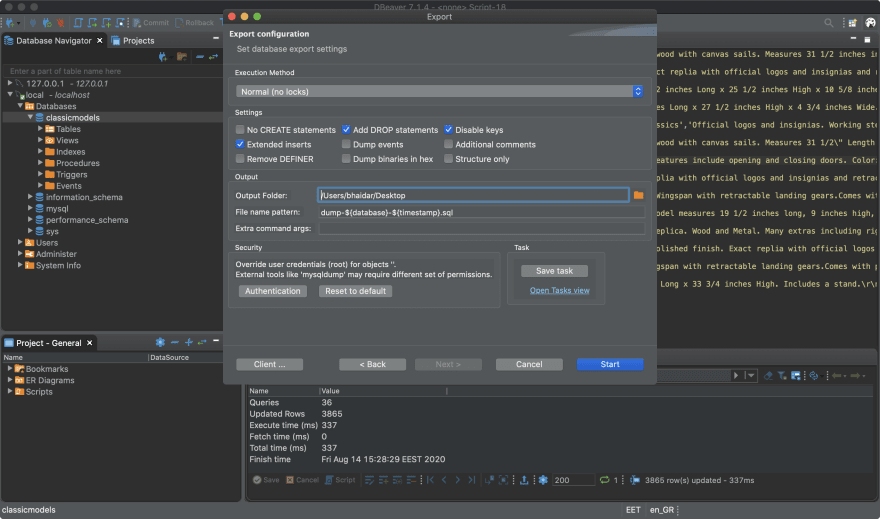
On this screen, you can adjust the settings of the dump by checking a few of them. You can even save this dump as a task, so that next time, you can click on it and let DBeaver generate the database dump for you.
Make sure to change the Output Folder value. In my case, I set that to be the Desktop folder. You can also change the format of the dump file name. For now, I will keep it as is.
Locate and click the Start button.
In a few seconds, you should receive a popup message reading Task is completed. If you don’t, let me know in the comments for some assistance.
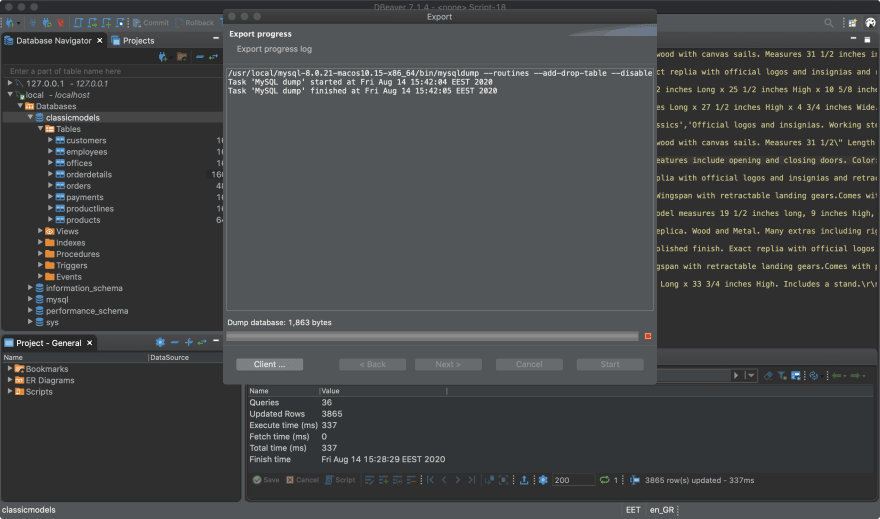
Navigate to the Desktop folder to verify the file does exist.
That’s all!
Credits : https://dev.to/bhaidar/how-to-dump-a-database-using-dbeaver-56ga